Professional streamers have teams around them that national television can still suck at. But to take your first steps in the world of streaming, you don't need much hardware or technical knowledge. Want to share your tutorial or gameplay live with others on Twitch or YouTube? In this article we help you with your first stream!
Streaming is a relatively young concept, even in the tech world; less than five years ago it was a tiny niche. Today, big streamers are real stars: they earn a lot of money with their videos and a wide audience recognizes that the communities around the streamers have a huge attraction. And we're not exaggerating when we say 'real stars', because the larger streamers have a huge reach. For Fortnite streamer Ninja, more than 100,000 live viewers is no exception. Just to be clear: that's the Kuip plus the Arena full to the brim!
01 Requirements
Before we start dreaming of a full stadium, let's go back to the beginning. What do you need to start your first stream? To start with, of course, a computer that runs the game you want to stream easily and smoothly – more on that later. In addition, of course, a decent internet connection; less than 10 Mbit/s upload is a risk, 15 Mbit/s or more is highly recommended. Furthermore, a good microphone, possibly a good webcam and last, but certainly not least: perseverance.
We cannot emphasize the latter enough. No one has more than a few to a handful of viewers in their first stream. It is important not to be fooled by the statistics of stars, but above all to create a real and natural stream in which you are yourself. If you make every stream happy and keep even one viewer happy, you'll have a nice group of viewers before you know it.
A webcam helps make the stream more personal, but there are plenty of major channels where the streamer doesn't appear or even say a word, so don't feel obligated. If for whatever reason you have to make a choice, we recommend investing in a good microphone before worrying about a (better) webcam. Nothing ruins a stream more than an unpleasant sound for your viewers or listeners.
Not just for games
While game streaming is arguably the most popular form, you can create other forms of content streaming with this basic course. For example, with the OBS software that we discuss below, you can actually edit, combine and share everything you do on your computer with the world. Making your own tutorials, hosting a talk show – you can imagine it that way.
02 Choose platform
The first important choice you make is which platform to use for your streams – and there are quite a few these days. However, the two largest platforms are far ahead in terms of visitor numbers: Twitch and YouTube.
YouTube is the giant everyone knows. The company dominates the online video industry and there is not a single competitor in sight. Nevertheless, Twitch has developed into the dominant game live streaming platform in a relatively short time, in which Twitch is even bigger than YouTube.
If we look at the functionalities that both platforms offer at the end of 2018, the differences in content are very small and there is no right or wrong choice. Both services are now quite similar and have largely similar services such as chats, donation options, subscription structures, integration with popular support services to further dress up your stream and so on. Much has been copied from each other; everything that turned out to be popular was also implemented smoothly by the competitor.
If you want to make more different types of videos, then YouTube as the dominant video platform is the logical choice. If you want to focus purely on live streaming, Twitch is the obvious choice. Twitch is slightly more accessible for new streamers because all functionalities focus purely on streaming.
Which choice you ultimately make has virtually no influence on the next steps. Signing up on both sites is relatively easy: choose a name, register an email address and you're good to go. A few pieces of personal text on your profile to welcome new viewers is recommended. You can adjust further settings later. You do have to write down your 'stream key'; you'll need it soon (Twitch: Dashboard / Settings / Channel / Primary Stream key, youtube: Creator Studio / Live Streaming / Stream key).


Console streaming
In this article we focus on streaming games from the PC. Prefer to stream gameplay from your console? You can, but then you still need a fairly sturdy computer (a recent Intel Core i5 or AMD Ryzen 5 is recommended) and a capture card, such as the Elgato HD60 S (via USB) or HD 60 Pro (internal card). The image from your console then goes through the capture card before you see it on your TV or monitor. The computer then processes the image for Twitch or YouTube.
For more experienced PC game streamers, such a separate stream PC is also recommended; then you can game and stream in the highest quality. That is not a cheap solution by the way.

03 Basic settings OBS
To shape our stream, we're going to work with OBS Studio. This software is free and can be used for the simplest streams or recording footage up to and including professional productions. Download OBS Studio from www.obsproject.com, select where you want to install OBS and launch the application.
In OBS Studio we first set the basic settings correctly. click on Settings / Video and put the Base (Canvas) Resolution at the resolution of your monitor (in most cases 1920 x 1080). The output resolution preferably leaves you the same; downscaling takes power and image quality. In the same screen we set the Common FPS Values in: 60 gives the best display, but requires at least a 10Mbit/s upload. With a connection between 5 and 10 Mbit/s we set the FPS Values to 30. These two settings are also referred to as 1080p60 and 1080p30.
Then go to the output-tab and put the Output Mode on Advanced. PC gamers with a very powerful CPU can use the encoder-setting on x264 for the best image quality. If you're not sure if your PC is powerful enough, set the Encoder setting to NVENC (Nvidia) if it AMD-alternative. Put the bit rate-setting on CBR and 6000 (for 1080p60) or 4000 (for 1080p30). Put the Keyframe Interval on 2.
Then go to the Streamtab, select here Twitch or YouTube and enter here the previously found Stream key in.

Super easy fashion?
If you really want to keep it simple, you can stream directly from the software that comes with your video card. For Nvidia cards there is Shadowplay (part of GeForce Experience), for AMD cards there is ReLive (part of Radeon settings). Both are integrated into the standard driver package and you can start both directly from your game by pressing alt-Z. You can then log in with your Twitch or YouTube account and start a live stream with the push of a button.
It is particularly accessible, but not without snags. This way you miss a lot of the extra features of OBS to really dress up your stream and position each element as you want. The quality is also an issue, because with Shadowplay and ReLive, the encoding of the stream can only be done via the video card. That'll give you decent picture quality, but not as good as tuning OBS properly - especially if you've got a really powerful PC with a recent Intel Core i7 or Ryzen 7.

04 Shaping the stream
Now we're going to tell OBS exactly what to send to YouTube or Twitch. We do this by first adding Sources. Press the + in the sourcespanel at the bottom (1) and select Display Capture. Game Capture seems logical, but Display Capture is more reliable. Keep in mind that viewers can then see everything you do on that screen during the stream; hiding your more questionable desktop icons probably won't hurt. In case of multiple screens, select the screen on which you will be gaming later. Now press OK.
You also add your webcam as Source to Video Capture Device. Your webcam will then appear on top of your screen display in the main OBS window (2). In that window you can enlarge, reduce or move parts in the normal way with the mouse. Tip: by holding down Alt you can also crop your webcam recording; this way you cut away unwanted pieces. Now give your webcam stream a nice spot in the picture.
Ready? Start your game, press Start Streaming (3) and you're live on tele... er, Twitch or YouTube!

A little tweaking
Chances are you'll run into some minor issues during your first stream. A number of common quirks in a row, with the solutions right away:
- Does the sound of the game dominate your voice? Then you can go under blender (4) the slider for Desktop Audio push something back.
- Does the stream look blocky? Then you can de (video) bit rate try to increase (try it first 1000-2000 there).
- Do you suffer from a stuttering stream? Your PC or your upload speed is often a bottleneck. You can exclude your connection by lowering the bitrate. Is your PC the problem? Then try streaming with a lower output resolution or a lower FPS value (both in Settings / Video).
05 Decor: sources and scenes
Streaming is extremely addictive, and after your first few streams, your fingers will be itching to dress up your stream more and more. Through sources For example, you can add text, images or other moving images to your stream.
Have you ever made a nice arrangement? Of scenes (5) you can create several and easily switch between different stream layouts. Tip: create a scene with only a cozy image (Source / Image), with or without a webcam. This way you can switch games without anyone seeing all the icons on your desktop.
06 Create hot keys
As soon as OBS Studio has been decorated a bit to taste, it is wise to set hotkeys via Settings / Hotkeys. For example, you can make easy-to-use key combinations to switch scenes or quickly mute your microphone.
07 Share your stream
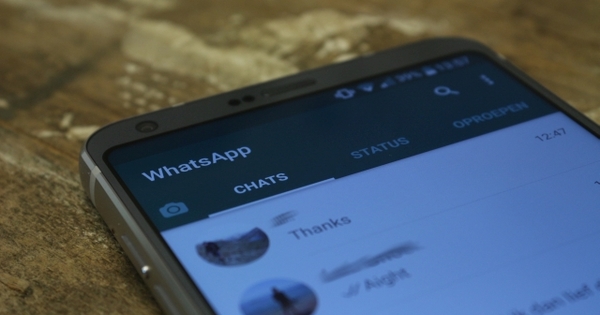
Streaming is indeed a hot topic, but there are also a lot of streamers looking for views. Certainly your first few streams, it is therefore indispensable to invite your friends and acquaintances to come and see you and chat with you. So invite them via WhatsApp or social media – if possible well before you start streaming.
08 Make it fun for yourself!
A small tip perhaps, but a tip that you should not underestimate. Trying to make it work at all costs and just get as many followers as possible is asking for trouble. Streamers who play games against their will, just because they are more popular, rarely last. Your viewers are not crazy either; a streamer who does what he or she actually enjoys with genuine enthusiasm is of course much more pleasant to watch. That is something a basic course cannot help you with. Bottom line, a successful stream is completely dependent on the streamer itself – the hardware and software are just an afterthought.
All popular streamers have one thing in common: perseverance. Streaming is a lot of fun and can take your gaming experience to the next level, but it takes a lot of time and willpower not to give up when your first streams don't go viral right away. Our advice is therefore not to look at viewer numbers, but just do it for your own pleasure. The rest will come naturally… that is, if you persevere!