Microsoft Office is the absolute standard when it comes to office software and an excellent suite. However, it is not free and storing all documents in the Microsoft cloud is not always the best choice either. However, alternatives are scarce and often lack central storage and collaboration capabilities. A surprising competitor is Synology Office, which you simply use on your nas. We show how.
Tip 01: Software on the NAS
You usually buy a NAS mainly because of the large local storage capacity and the ease of accessing your own files from any device and at any time. But a NAS can do much more, such as downloading media, streaming movies and audio and displaying photos. Less known is that NAS market leader Synology has its own Office suite that runs entirely on the NAS. It is not as extensive as Microsoft Office, but the difference is mainly in functions of Word and Excel that many people do not use anyway. Synology Office also works in a browser window and can therefore be compared more with Google Docs than with the standalone software MS Office.

Tip 02: Prepare the NAS
Before you start installing Synology Office on the NAS, it is important to configure and check the NAS. Log in to the NAS and check if there is an update available for the DSM operating software via Start / Control Panel / Update and Restore. Is there a new version, click on Download / Update Now. The nas will update the software and reboot. Then log in again and check for additional updates. Then update all installed packages via Package Center / Installed / Update All. It also doesn't hurt to disable or remove packages you no longer use. To do this, click next to the name of the package and choose . in the drop-down menu Stop or remove.

Is it really free?
Let's compare the cost of Synology Office and Microsoft Office. MS Office 365 Home costs 100 euros per year. For that, you get Word, Excel, PowerPoint, Outlook, Access, Publisher, OneNote and Skype for six family members, plus 1 TB of OneDrive storage space for each. It works on Windows, macOS, iOS and Android. However, Synology Office is free. For that you get a word processor, spreadsheet, presentation program and synchronization via Synology Drive. Apart from the purchase of your NAS (which you probably already had), Synology Office will not cost you any money, but only some space on your NAS.
Using a NAS only as a storage medium does not do justice to the capabilities of the NASTip 03: Install Office
Install Synology Office now. Open it Package Center and click All packages. In the middle of the screen, choose the Collaboration Suite. The selection of available packages has now been narrowed down to packages related to Synology Office. Install anyway office, drive, chat, Note Station, calendar and the Synology Application Service. Both mail packages are optional and only important if you are also going to mail via the NAS. To install a component, click Install and then go through any steps of the installation wizard.

A NAS is not a backup
Where Microsoft makes all necessary backups of the files on OneDrive for you, this does not happen automatically on the NAS and you have to arrange it yourself when using Synology Office. Don't make the mistake of thinking that no backup is needed because the files are on the NAS anyway. If you use Synology Office, the NAS is the only storage location and it is therefore wise to back it up. There are plenty of options for that. You can back up to another NAS or external hard drive, to online storage services, or to an external backup utility like the Tandberg RDX Quikstor.

Tip 04: Create users
Many NAS devices only have one user, the admin. If you want to make sensible use of Synology Office, that is no longer possible. Everyone who will use the Office programs must have their own account on the NAS, and that also applies to yourself as an administrator. Open it Control Panel from the Synology and choose User / Create / Create user. Fill in all fields for the first user, especially Name, Email and Password are important. click on Next one and make him user of the group users and the group http, but not from the admin-group! Give the new user access to the applications chat, DSM, drive and possibly extras such as File Station and Universal Search. It is also useful to have the option Home folder enable for each user. To do this, click on the tab Advanced. At the bottom of the screen, put a checkmark Enable User Home Service and determine the location of the home folders. Also put the option Enable Trash enabling users to recover deleted files. It is also recommended to select the Force users to change password after administrator reset password to turn on.

Tip 05: Start Office
To start Synology Office, open the main menu of the nas and start drive. Drive opens in a new browser tab. Although Synology Office wants to be a real competitor to Microsoft Office, the way you use the package is more like Google Docs. All programs run in the browser and you do not start with starting a word processor or calculation program, but you work from the documents. Drive is therefore a kind of Explorer for the documents and folders on the NAS. The left margin of Drive shows the most important parts. From top to bottom these are the access to the folder My files in which their own documents will appear, the team folder in which documents of the team can be placed, and below that a number of 'searches' such as Shared with me, Shared with others, Recent, Starred and Garbage can.

Tip 06: Create a document
To create a first document click on My files and then click the plus sign at the top left. You now have the choice of making a Document, An Spreadsheet or slides. The names and colors that Synology uses for these three types of documents are the same as Microsoft uses in Office for Word, Excel, and PowerPoint. To create a first text document, click Document. The NAS opens the new document in a new browser tab.
 Synology Office programs work just like the web versions of Word, Excel and PowerPoint
 Tip 07: Edit document
After opening you can immediately start writing. It's not difficult, because the interface of the word processor in Synology Office resembles that of Word like two drops of water. Filling a document with text and images and giving the whole a nice look takes little effort. If you take a look around in this part of Synology Office, you will first see the menus from top to bottom in which all parts of the package have a place. Below that is the toolbar with buttons for the most frequently used items such as the font, font size, color, and so on. You can choose a font by clicking the button next to Arial and select a font from the list. But you can also choose one of the paragraph styles from the menu next to it, by clicking the button next to normal text to click. If not all functions fit on this bar, there is a double down arrow on the far right. Click on it to make the extra functions visible.

Tip 08: Insert elements
To insert an image choose Insert / Image. At the top of the window, choose the location where the image can be found. That can be your PC, Synology Drive, the NAS itself or an online location. If the image is on the PC, you can drag and drop it from the PC to the upload window in the browser. Then click OK. You can resize and rotate the image just like in Word. If you don't want to insert an image but a table, click on Insert / Table. But you can also use the button for Insert table use on the toolbar. And there are many more things you can include in the document this way, such as shapes, graphs, and comments.

Tip 09: Save document
To save a document, open the menu File and choose you Renaming. By default, Synology Office calls each new document "Untitled" until it is saved. Type in the new name and click OK. You can also do the same by clicking the blue name at the top right of the browser window. Now that the name has been changed, save the document via Save file. Or use the hotkey combination Ctrl+Sbecause they just work here too. After the document has been saved, you can also close it. You do this by closing the browser tab. You are now back in Synology Drive and you will now also see the new document in the My Documents folder. You can also create and save a calculation document or a presentation in the same way.

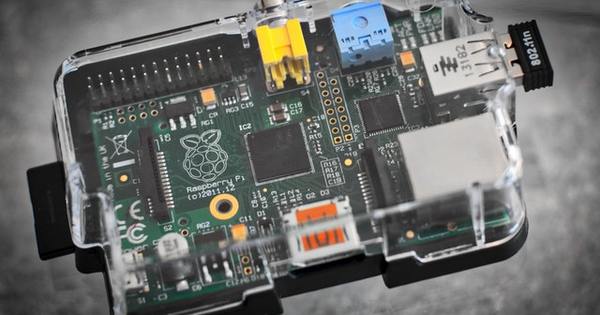
Which Synology do you need?
You don't need a heavy NAS for Synology Office, but not every Synology is suitable. The lightest Synology's with only one drive do not meet the requirements of the package, but from two drives they meet almost all. Configure the two drives to prevent document loss or with RAID1 or SHR, Synology's automatic raid. JBOD or RAID0 are really not recommended in combination with Synology Office. Also consider the amount of memory. Because the NAS will also perform other tasks if you are working on multiple documents with several people, 512 MB of memory is actually too little. As a rule of thumb, any Synology NAS with two drives and at least 1 GB of onboard memory is usable. To be sure, check the list of compatible models at www.synology.com.
 For Synology Office you need a Synology NAS with at least two disks and 1 GB of RAM
 Tip 10: Label documents
You can traditionally organize your documents in folders. With a click on it plus sign create a new folder. Another way is to label documents. Select the document and click Labels. Type a name for the label and click To make. Choose a label color and click OK to associate the label with the document. You will then also see the labels used in the left margin of Drive. Click on a label and all documents with that label will be displayed. To link an existing label to a document, drag and drop it in Drive to the label. You can also include a document in a favorites list by assigning a star to it. You can also search through all documents by keyword or other characteristics via the search box at the top right of the screen.

Tip 11: Share a document
If you want others to be able to read or even edit a document, you start by sharing the document with those others. click on To share and select at the Privacy settings the way you want to share. Then type in the field List of invitees the user's name and give him or her specific permissions for that document. Of to manage the other becomes full co-owner of the document, but there are also several lower levels of permissions. You can give multiple people rights via the plus sign. Then click Save. The people you share the document with will then see it in the folder Shared with me in their Drive app.

Tip 12: Collaborate
Shared documents usually also involve changes and/or comments. In the map Shared with me contains documents that others have shared with you. After opening you can do what you have received rights for. Via the button Insert comment for example, on the toolbar at the top of the screen you can add comments. These can then be seen next to it in the margin. A document can also contain comments from multiple people. You can also respond to this yourself. This way you can improve the shared document together with the others. As the owner of a document, you can check off comments when they have been addressed and they disappear. If Synology Chat is installed on the NAS, you can also discuss the comments live in a chat with the other users.

Tip 13: Remote access
To make it even easier to access the documents on the NAS, Synology offers some useful apps. For the PC, there is Synology Drive that creates a folder on the computer and synchronizes with the documents on the NAS. With a double click on one of the documents, Synology Office opens in the browser and you can edit the document. There are also Synology Drive apps for Apple and Android devices. For secure access over the Internet, the app offers the Synology QuickConnect. With a few clicks you have it all working. Every new user who logs in to Drive on the NAS for the first time is offered the opportunity to download and install the apps.