Lamps that switch on automatically, the thermostat that keeps your home at a pleasant temperature and the washing machine that you switch on remotely: have you made your home smart yet? That is perfectly doable with a Raspberry Pi and the Domoticz software!
Tip 01: Parts
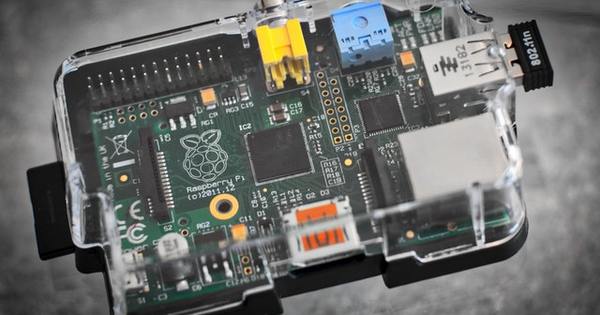
What you ultimately need in terms of parts strongly depends on your wishes. For this article we are going to work with a Raspberry Pi 3. There are various providers that offer so-called starter kits. With this you get the basic necessities at home in one go. A good example of a provider with such a kit is SOS Solutions. Make sure you have at least the following parts when you get started with Domoticz on the Raspberry Pi: - Raspberry Pi 3 Model B with suitable power supply, a micro-SD card of at least 8 GB, an SD card reader, a network cable , a display with HDMI cable and a USB mouse and keyboard.
If you already have a working Raspberry Pi, you can skip the first part of this article. After all, you already have a suitable operating system installed and a working Raspberry Pi. Then go straight to the 'Getting started with Domoticz' section.

Have it installed
If you are going to get started with Raspberry Pi for the first time and if you order a starter kit, in many cases you can have the operating system installed by the supplier for a small fee. You can then immediately install Domoticz. We do the installation of the operating system ourselves.
Tip 02: Operating System
To use Domoticz on a Pi, we first need an operating system. There are different operating systems for the Pi, we choose Raspbian Lite. To install this, we use the NOOBS (New Out of Box Software) installation manager. This shows a menu where you can choose from a selection of operating systems, and NOOBS also helps you set additional settings such as the wireless network connection. First, download the latest version of NOOBS to your PC. The file is approximately 1.5 GB in size. Right click on the downloaded zip file and choose Unpacking.
Tip 03: SD Card
If you're working with a memory card you've used before, format it before continuing. Format the card with the free SD Memory Card Formatter program. This ensures that the memory card is formatted according to the correct standard and prevents problems with the installation of the operating system. You can find the freeware here.
Then place the empty SD card in the memory card reader and open your explorer (use the key combination Windows key + E if necessary). Copy the extracted files from NOOBS to the SD card.
 Raspbian Lite is a stripped-down version of Raspbian, which is perfectly adequate for our task
 Tip 04: Raspberry Pi
It's time to get the Raspberry Pi up and running. Connect a USB keyboard and USB mouse to the device and connect the Raspberry Pi to a display via an HDMI cable. Insert the micro SD card you copied NOOBS to before. Everything connected? Then connect the power supply. The Raspberry Pi boots up. Patience is a virtue: especially the first time, this can take some time. Once the Raspberry Pi has started, the NOOBS main window will appear with a selection of operating systems. Our preference is for Raspbian Lite. This is a stripped-down version of Raspbian, which is perfectly adequate for our task. However, this operating system is not available by default and must be downloaded. Fortunately, this is not too difficult, because the Raspberry Pi 3 has a built-in WiFi card. Press the W or click WiFinetworks and connect to your wireless network. Immediately after this, the other available operating systems appear, including Raspbian Lite. Choose this operating system and press Enter. Then choose install or press I. The operating system will be downloaded and installed. The first time you start the system, Raspberry will ask for the login information. By default, the username is pi and the password raspberry. Once you see the command line with the blinking cursor, the system is ready to go!

Keyboard
The correct keyboard for your Raspberry Pi may not be installed, causing certain keystrokes, for example, to not produce the correct character. Fortunately, you can adjust this yourself relatively quickly. At the command line, type sudo raspi-config. Choose LocalizationOptions and choose the correct keyboard.
Tip 05: Bring in Domoticz
Domoticz is a compact system for home automation that allows you to operate a multitude of devices. This includes sensors such as weather stations, electricity and water, but also smart devices such as smart lighting and speakers. You can operate Domoticz via various devices, such as your laptop, tablet and smartphone. The user environment is web-based, and can be installed on different devices. We use the Raspberry Pi that we prepared for this in the previous steps.
We first bring in Domoticz on the Pi. With the Pi's command line in front of you, issue the following command followed by pressing Enter:
curl -L install.domoticz.com | sudo bash
The home screen will now ask if you want to use http and https. Choose both and do not change anything in the default settings. In the next screen you will be asked which port number you want to use. We also choose 8080 and press OK. We also leave the default port number 443 of https unchanged. In the end screen you can see where to surf to with the browser, in our case: //192.168.0.156:8080.
 You can operate Domoticz via various devices, such as your laptop, tablet and smartphone
 Tip 06: Set up Domoticz
Now open a browser such as Chrome on your computer and surf to the website of your Domoticz installation. In our case, we type in the address bar //192.168.0.156:8080. If it doesn't work, read the 'Domoticz beta version' box. Domoticz is divided into different categories. click on Setup for the institutions. below Hardware you will find hardware with which you can communicate directly from Domoticz. You need such hardware for most devices: it forms the connecting link between the end device (eg lighting) and Domoticz. A good example of this is the Bridge of Philips Hue lighting. The second category is Devices. All detected smart devices are shown here. This section is still empty at the beginning, because you will later fill it with devices yourself. Finally you will find under Settings all other settings.

Domoticz beta version
If you are unable to access your Domoticz environment in the next step, there may be a missing file that prevents Domoticz from loading. In many cases, this problem is related to the missing library libssl.so. At the time of writing, a solution is being worked on. The latest beta version of Domoticz does not suffer from this. If you experience problems, try installing the beta version. You do that as follows. At the command line of your Raspberry Pi, type: cd domoticz and press Enter. Type next ./update beta and press Enter again. Domoticz is now being updated to the latest version.
Tip 07: General settings
below Setup / Settings find the general settings page. Here you can switch the language from English to Dutch. We will arrange this immediately, so that all menus and options will be shown in Dutch from now on. Then enter your current location at Location. This information is important, for example to find out when the sun rises and sets, and to know which weather forecast applies to your location. At the bottom you will find the section Visiblemenus. Here you determine which parts should be included in the tabs at the top. We are happy with the default selection for now.

Tip 08: Hardware IP addresses
To be able to control your smart devices such as lighting and thermostat, you connect them to Domoticz. You sometimes need an intermediate station for this, we also call this a gateway or bridge. This part takes care of the translation between Domoticz and the final device. Think, for example, of the bridge of your Hue lighting: this box communicates with the lamps. To add this hardware, you need the corresponding IP address. If you use fixed IP addresses and if you have an overview, take this into account. In many cases you will use dynamic IP addresses assigned by the router. You can easily find out this information on the configuration page of the router. Open this page and request an overview of assigned IP addresses. Also make sure you have the passwords for the hardware.

Tip 09: Add hardware
Click on the home screen Hardware. Here you indicate which devices such as bridges and gateways are present in your home. Choose from the list at Type the device you want to add, for example Philips Hue Bridge. The list includes a large number of devices, including the well-known Toon thermostat, Nest thermostat, Philips Hue and Logitech Harmony. You can add some devices relatively easily, such as the Hue Bridge. Enter the IP address and port, and press the round link button on the Hue bridge itself. In Domoticz you click immediately afterwards Register on Bridge. The link is then created automatically and you no longer have to enter a username and password. Once all data has been entered, add the device via Add. The device is added to the hardware list.
 In the table you will find all information about the devices and their status
 Tip 10: Table devices
Once you've added the parts like the Hue Bridge, you can find the corresponding devices (like the actual lights) via Institutions / Devices. This table contains interesting information about the different devices and their status. For example, if you have added the Toon thermostat or Nest thermostat, you will see the current temperature settings here. 'Hidden' information is also visible here, for example, the Philips Hue motion detector also contains a thermometer, and that data is also shown here. This table therefore gives you the 'building blocks' of your smart home.

Tip 11: Add
Now you can add the individual devices to Domoticz. In our example, we want to control the Hue lighting in the study. We look for this lamp in the list. If you can't find the part, use the search box at the top right. Click the button now Lamp/add chess (the green circle with the white arrow). Give the part a good name and click Add device. You will then find the device on the tab Switches and it is immediately ready to use. Repeat these steps for all the devices you want to add.
Tip 12: Operate the device
From the tab Switches you can control the added devices. In the case of a lamp, slide the switch to the left to dim it. Press the button Timers. Here you determine when the device (such as the lamp) should be activated, for example at sunrise. You can also specify here on which days the promotions should apply. If you use certain devices often, add them to your favorites: search in the tab Switches the item and click the star button (bottom left of the box). You can find your favorites on the tab Dashboard. You can also put all devices from the living room in one group, for example: via the tab Groups. At the bottom of the window, click Device on the device you want to add and then Add.

Tip 13: Events
If you understand how Domoticz works, you can get started with events. This allows you to automate almost all components that you have linked to Domoticz. Go to Institutions / More options / Events. With Blockly you can automate your actions based on visual building blocks. This is how you will find Devices an overview of parts such as switches, groups and scenes. below Control determine the “If” conditions. For example, "When the sun is down, then". If you need the current time for an action, you can use it via the section time. For example, you can build a situation in which the lamps in the living room switch on automatically when the sun has set and the motion detector has not registered anyone for a while. Experiment with the possibilities!
Have the lights in the living room turn on automatically when the sun goes downTip 14: Current weather
Interesting is the possibility to link Domoticz to Weather Underground, an online weather service. You can request the current weather from various weather stations. You add that in Domoticz to the section Device, choose at Type in front of Weather Underground. To use the service, you need an API key. Go to www.wunderground.com and create a free account and sign up. Then go here, choose Stratus Plan and Developer (bottom). You pay nothing for this. click on Purchase Key, indicate that you need the key for non-commercial use and at Project give up on Domoticz. You need the API key shown.
Now it is important to select the weather station that is near you. Go here and check out the weather stations. Click on the weather station you want to use. In the window you enter the Station ID. Open Domoticz and choose Institutions / Hardware. Bee Type do you choose Weather Underground. Enter your own API key in the field, and the Station ID at Location. Click Add. If the setup went well, you will find the new virtual devices via Institutions / Devices. Here you see an anemometer, barometer and rain gauge, which you can use in your circuits.

Tip 15: Problems?
If you are having problems, it is useful to know that Domoticz in the log (Institutions / log) keeps track of what's going on with the devices in your home. On the tab Problem you will find an overview of possible errors. If you want to quickly go through all the entries, you can use the filter function at the top right.
Are you stuck? Characteristic of Domoticz is the large group of enthusiastic users, who also exchange experiences with each other. An extensive user forum can be found here. Especially if you are just starting out with Domoticz, the forum is a very valuable resource where you will be quickly helped by more experienced users. With an open source project such as Domoticz, this is not an unnecessary luxury, since extensive documentation is not self-evident.
Close Domoticz
To close or restart Domoticz, choose Institutions / More options / Restart computer or Shut down computer. Never just unplug the power cable from your Raspberry Pi.